

Don’t Let a Paint Chip Ruin Your Day – Fix It Yourself!
29th Jun 2015
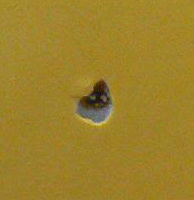
Paint chips can be heart breaking - especially the first to occur to your new car, or new paint job. Not only are they unsightly, but if the chip exposes a metal surface, rust can begin to form. Horrors.
There are ways to protect against chips from occurring in the first place. Car Bras (the vinyl masks that were all the rage in the 1980’s and 90’s) will shield the nose of the car from chips, but can create issues of their own. Sand can become trapped between the bra and body and scuff the paint. A poor quality bra often fits loose and can flap in the wind and thereby abrade paint. If you decide use a bra, be sure yours comes from a premium manufacturer, has excellent fit, a soft backing, and is made from thick vinyl that won’t flap in the wind. Don’t leave the bra on the vehicle if it is wet. Frequently take it off and remove any dirt/grit from the painted surface and then brush off or vacuum the backing to remove debris. Another means of protection are the clear vinyl films that can be adhered to the nose, as well as the body behind the wheels and on rocker panels to protect from rocks gravel and grit. I personally like that option best. However, nothing says 1989 like a Car Bra.
Back to the paint chip that occurred, and is bumming you out. One way to fix it is bring it to a body shop and have them sand out the chip and reshoot the paint. However, that is a bit drastic and too expensive for many people. A body shop can also do a fine job of filling in the chip with touch-up paint for - at a cost. Another angle is to do-it-yourself, and if you choose that option read on.
There are many paint chip repair kits on the market that include chemicals, paints and tools. These can get pricey. This article will focus on doing job using materials that you can round up yourself. Perhaps some may already be sitting in your garage. Please note, this article assumes that you have the necessary skills to handle the job successfully… Otherwise the body shop might be your better option.
Step 1: Stare the paint chip down. Talk mean to it. Say things like: “How dare you” and “I’m gonna fix you real good”.
Step 2: Identify the proper paint color using a paint code. On 1983 and newer vehicles this information can usually be found on a sticker on the driver side door.It can also be determined by a paint shop using your vehicle identification number. If it is an older color or a custom color and you don’t know the code, you’re out of luck. Actually, you can try visiting a PPG, DuPont, Sherwin Williams or BASF paint distributor to review their color chip books for a match. If you can’t find a good match in the color chip books, then ask them if they have a photo spectrum gun that they can use to take a picture of the vehicles panel. They then run this through their formulation database to determine a close color match. If your car has clear coat, you’ll also want to get a small bottle of that. If the chip is larger than 1/8”, you should get a small bottle of primer as well.
Step 3: Now we get down to the nitty-gritty, pun fully intended. You'll need 1000-grit, 3M Wet-or-Dry sandpaper, craft sticks of various sizes, cotton swabs, tweezers, glue dots, various paper punches. You can most find everything at a craft store. I also recommend getting a pack of paint brushes that are used for model kit building, with sizes ranging from very fine – for small chips - to a few sizes ranging up to about ¼” wide.
Step 4: Now we are going to get all arts and crafts. Remember when Captain Kangaroo used to bring out his shoebox full of art supplies? No? Oh well, guess you had to be there. Anyway, we are going to make sanders now. This involves using a paper punch to cut discs out of the sandpaper, and then using the glue dots to adhere them to the craft sticks (which resemble popsicle sticks).How big the disks should be depends on the size of the chip. Keep in mind you want to make the sandpaper disc just about the same size as the chip. In some cases the piece of sandpaper might have to be small and mounted on the tip of a narrow diameter wooden dowel. Remember that for all sanding operations covered in this article you don’t want to sand much farther than edge of the chip. So size your sanders accordingly.
Step 5: Wash the car with car wash and dry thoroughly.
Step 6: Wax and other residue needs to be removed from the work area. Acryli-Clean by Ditzler works well for this and is available at professional body shop stores. It can be applied with a rag to the immediate area around the chip. Follow the instructions on the can.
Step 7: Now comes the preparation step. The sanders are used to sand down the edges of the chip using small circular motions. Be sure the edges are smooth and there isn’t any loose paint. Remember, you don’t want to sand much beyond the edges of the chip – just enough to smooth it, but don’t go sanding into undamaged paint. As well, if there is metal exposed by the chip and rust has begun to form the sanding will help to remove the rust. Keep in mind you should only dry sand as introducing water can reintroduce rust. If there is rust in the chip, it is also recommended to apply Use CLR or equivalent to dissolve and remove it. It can be applied with a cotton swab, like a Q-Tip.
Step 8: Once the chip is properly sanded and clean of rust and debris wipe it off with the Acryli-Clean and dry thoroughly. Next grab your primer and an appropriate sized model paint brush. Don’t glob the paint on, but rather build it up with a couple of thin coats – applying from the center of the chip outward, and allowing it to dry in between coats. When done with the building process let the primer dry thoroughly. If the chip is about 1/8” or less you can move on to the painting step. If it is larger, it is best to gently wet sand it smooth – being careful not to sand away too much primer.
Step 9: When primer is completely dry you can apply the paint to the chip. Again, be patient and build up the paint in the chip in thin layers, and allow it to dry between layers. If you don’t have a clear coat, build up the layers until they are even with the paint on the car. As you get close to being level you can lightly wet sand the touch up paint with the 1000 grit paper (when the paint is dry) to “blend” it with the surrounding paint. If you do have clear coat, you’ll need to make sure to not completely build the paint up to level as you’ll need to leave room for the clear coat. As with the touch-up paint, lightly wet sand the dried clear coat to blend it with the surrounding clear coat.
Step 10: Once the repair is flush to the rest of the paint, take the rubbing compound and polish the area with a clean, cotton cloth. Wash the area to clean off all the rubbing compound, rinse and dry. The repair should be left to continue to cure for about a week before waxing the car.
So there you have it – the way to fix paint chips yourself. It is indeed quite a bit of work, but well worth it. That brings up the point of time consumed; doing the job right can take the best part of a weekend. Perhaps the expense of having the chip repaired by a body shop isn’t so bad after all…